1. Tell me more about this module
The Website and Online Registration module is a powerful and very useful tool for event management. The module allows you to showcase your events or classes in a complete event website. Promote your events, provide detailed information, and collect registrations and payments (coming soon) in one centralized online location. You can attach a website to one or more events which saves you time and effort.
Please be aware that creating an Event Website may require basic knowledge of HTML
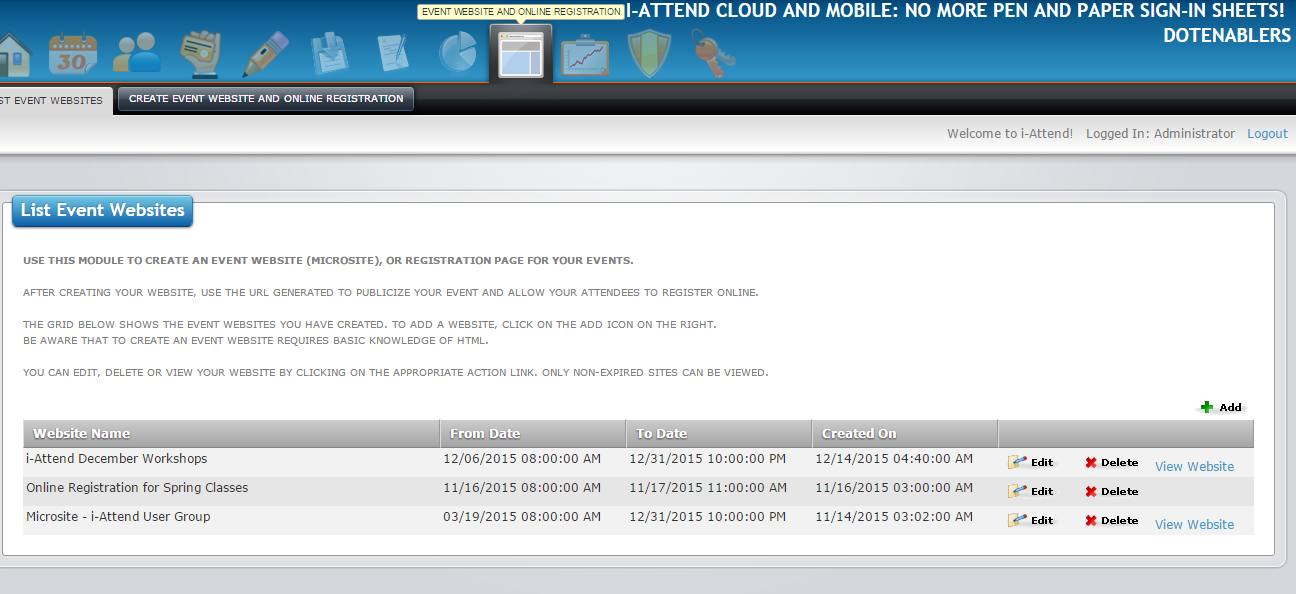
2. List Websites
This screen lists all your event websites. You can Edit, Delete or View Website (for unexpired sites).
1. To ADD a website simply click on the ADD icon located on the right of the screen.
3. To EDIT a website click on EDIT icon.
4. To DELETE a website click on DELETE icon.
5. To VIEW your website click on the View Website link. You can not view an expired website.
3. Create Website and Registration Form
Now you can create and design your own website.
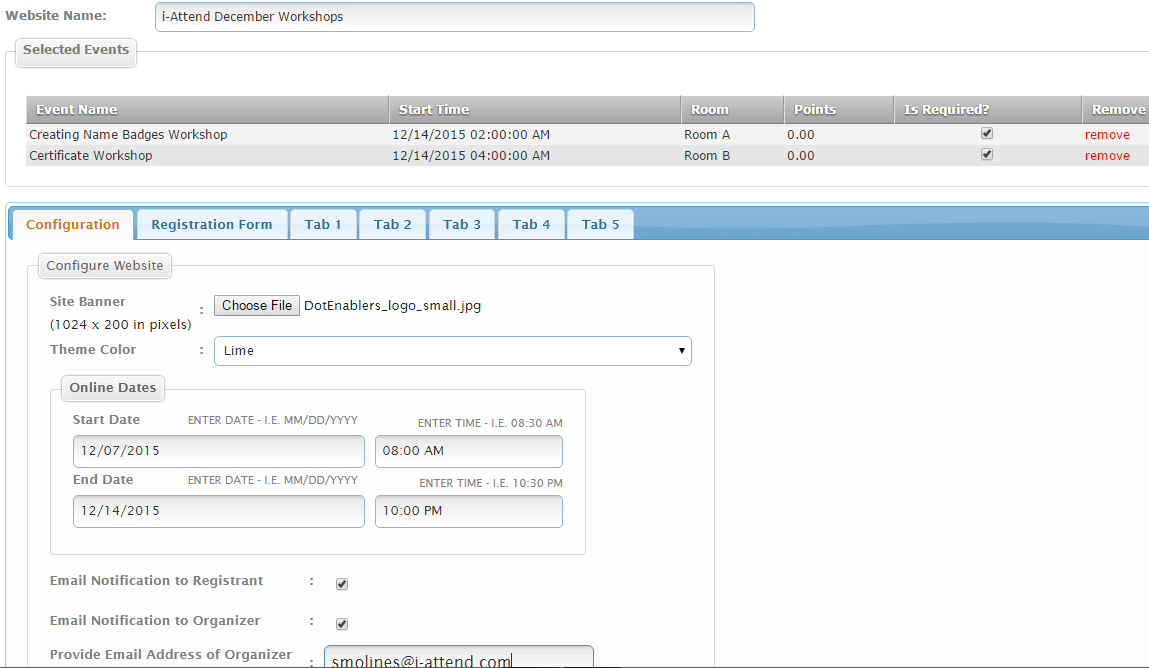
1. Give your Website a descriptive name.
2. In the Selected Events section click on the ADD icon to select your events.
3. Enter the start and end dates of the event and click on the Search button.
4. Check the events you want included on the website and registration form.
You will notice seven tabs named Configuration, Registration Form, Tab 1, Tab 2, Tab 3, Tab 4, and Tab 5.
Configuration Tab:
1. Upload a Site Banner with dimension 1024 x 200 pixels. This will personalize the website for your event.
2. Select a theme color for the website.
3. Enter a Start Date and time as well as an End Date and time. These are the dates when you want the website to be active/live.
4. Check to send Email Notification/Confirmation to registrant.
5. Check to send Email Notification/Confirmation to organizer(s). This is the same email that registrant receives.
6. Check to include a QR Code in the email confirmation. We recommend doing this.
7. Use the default Email Content as shown or feel free to modify it. We recommend including the parameters $FirstName, $LastName, and $EventInfo in the content, but feel free to modify the content to your choosing.
8. At this point, you can click on the Save Button and i-Attend will create a unique URL of your website OR you can further customize by following the steps below.
Registration Form, Tabs 1 - 5:
9. Each of tabs including the registration form provides you the option to either show it on your website or not. You can also customize what title you want for each of the tabs. We recommend to have at least the Registration Form tab shown on the website.
10. On the Registration Form tab, you can enter custom text above the registration section. This text can be your event details or any information
you want to promote and share with your audience.
11. First Name, Last Name and Email Address are required fields in i-Attend - and thus, they will always show on the registration form. You can specify other fields to appear by selecting and clicking on the Show check-box for each field. Notice that you can also include User Defined Fields on the registration form. To require entry of data click on the Require check-box for each field.
12. You can add additional tabs for your website by clicking the Show this tab on website, providing a title for the tab, and adding content specific to that tab.
13. Click on the Save button when done. i-Attend will create a unique URL for your website.