1. What can I do with this module?
Having the potential to free up a substantial amount of man-hours, this is one of the most popular modules. It will replace the days you spend to design, mail-merge, sort, filter and distribute your certificates.
You can use this module to create Continuing Education Certificates, Attendance Certificates, and Recognition Certificates. Some clients even use this as an invoice.
What? Yes, we're completely serious. Follow the instructions below.
2. List Certificates
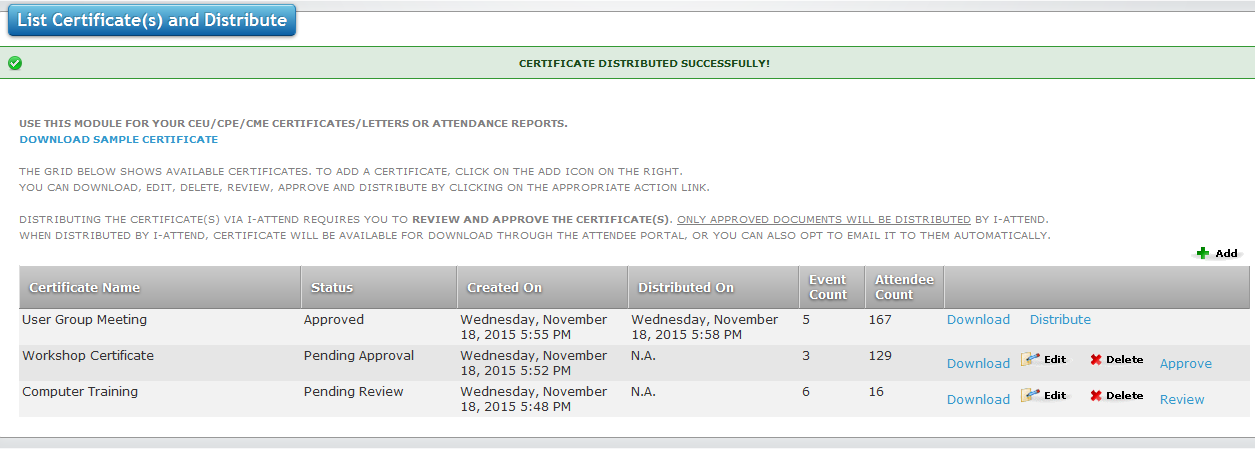
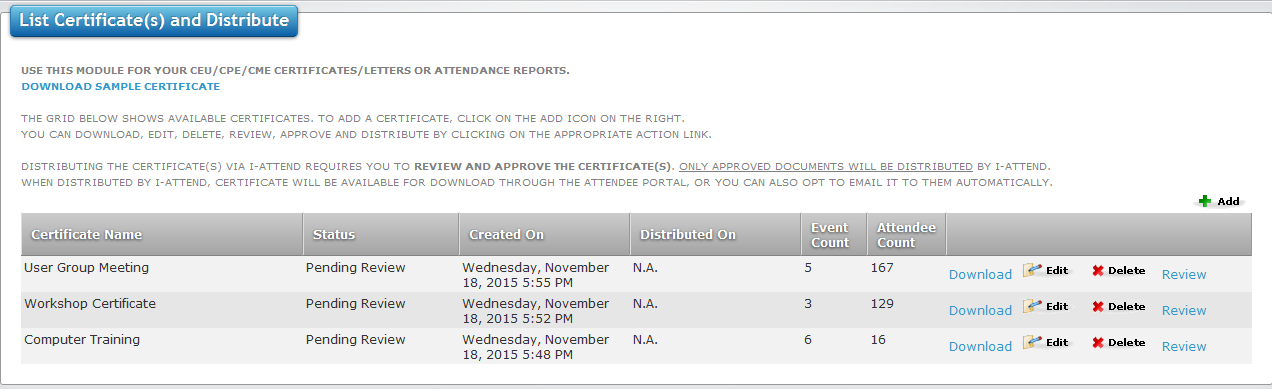
This grid shows you all the certificates you have and their statuses.
Navigate to Certificates and Distribution module -> List Certificates and Distribute tab
1. To ADD a certificate simply click on the ADD icon located on the right of the screen.
3. To EDIT a certificate click on EDIT icon. You can not edit distributed certificates.
4. To DELETE a certificate click on DELETE icon. You can not delete distributed certificates.
5. To VIEW your certificates click on the Download link.
3. Create and Design Certificates
Now you can create and design your own certificates. Include any number of events/classes then enter your customized text, upload your logo, and
use parameters supplied to include the data values of your attendees and events.
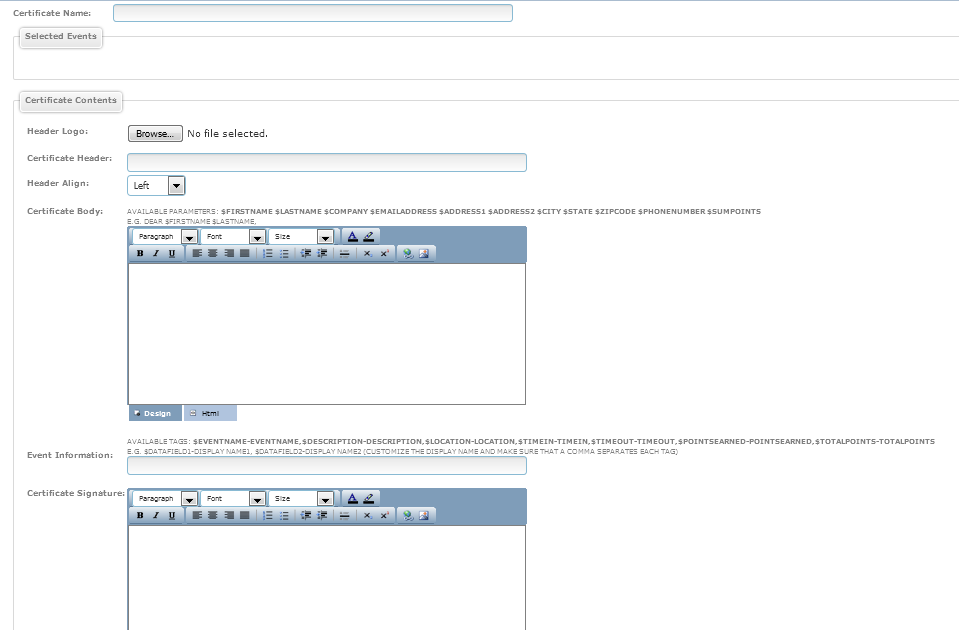
1. Give your certificate a descriptive name
2. In the Selected Events section, click on the ADD icon to choose your events.
3. Enter the start and end dates of the event and click on the Search button.
4. Check the events you want included on the certificate.
The Certificate has four sections - header, body, event, and signature. The header section is where you can have your logo or any image.
The body contains your descriptive text about the certificate. You can include attendee data values such as first names,
last names, and sums of points. The event section contains detailed information about the event(s) such as event names, descriptions, points/credits, and check-ins/outs.
5. Include a logo for the certificate. (Recommended)
6. Enter a header for your certificate. (Optional)
7. Align the logo and header.
8. Enter your custom text for the body of the certificate. The following data values can be included:
$FirstName $LastName $Company $EmailAddress $Address1 $Address2 $City $State $ZipCode $PhoneNumber $SumPoints
Note that $SumPoints is the total points the attendee earned by attending the events you have included for this certificate.
9. Certificate Table (Optional) - this section contains detail information about the events contained in this certificate attended by the person.
It will be displayed like a table containing information you want displayed. The following data values can be included:
$EventName-EventName,$Description-Description,$Location-Location,$TimeIn-TimeIn,$TimeOut-TimeOut,$PointsEarned-PointsEarned,$TotalPoints-TotalPoints
Note the following about the data values above: (1) Dollar sign ($) follows the parameter followed by a dash (-) and then a title, (2) and each data value is delimited by a comma.
$EventName-EventName : The actual data parameter is preceded by a dollar sign. Do not modify this. The title is followed by a minus sign. You may change this.
Examples:
$EventName-EventName,$TimeIn-TimeIn,$PointsEarned-PointsEarned will display as EventName, TimeIn, PointsEarned in separate columns.
$EventName-Class Name,$TimeIn-Check In Time,$PointsEarned-Credits Earned will display as Class Name, Check In Time, Credit Earned in separate columns.
You have the ability to modify the title to whatever you want.
10. Certificate Signature (Optional) - you can enter more custom text here. This will show below the event information section of the certificate.
11. Click on Save Certificate
4. Distribute Certificates
i-Attend has the ability to distribute your certificates via Email and/or Attend portal. Only approved certificates can be distributed.
1. Download and review the certificates by clicking on the Download link.
2. Confirm that you have completed your review by clicking on the Review link. Notice that you status will change from Pending Review to Pending Approval.
3. Confirm approval by clicking on the Approval link. Notice that you status will change from Pending Approval to Approved.
4. Distribute the certificates by clicking on the Distribute link. A pop-up window will appear with the option to also distribute by email.
Though we make our best effort to email the certificates it is also possible that it may be flagged as spam by your email provider. Alternatively, your attendees can login to i-Attend and retrieve their certificates themselves.